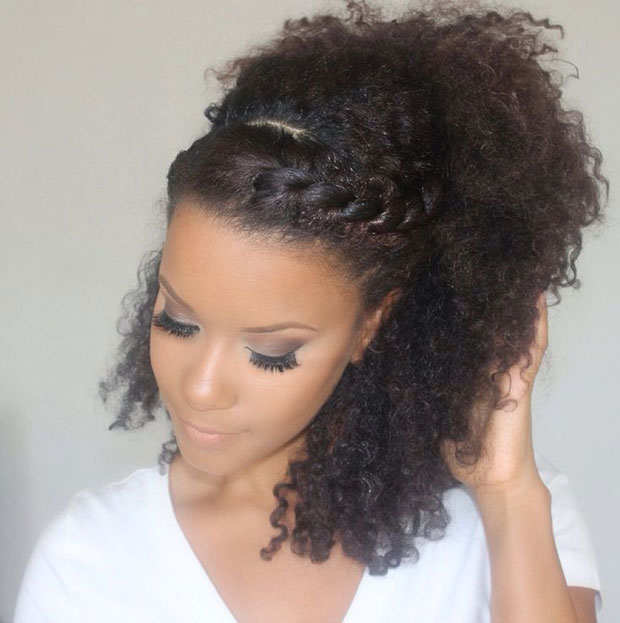
To make braids with curly hair look fabulous, you need to know a few important things about this type of hair. The first thing to remember is that your hair needs to be damp and not completely dry. If your hair is completely dry, the waves it creates will be less pronounced and they will dissipate throughout the day. On the other hand, if your Hair is damp and not completely dry, the waves will be more visible and they will take longer to soften. Therefore, if your hair is stick straight or thin, it will be best to braid your hair slightly damp.
French braids
The first step in making a French braid is to section your Hair. Make sure each section is three to four inches wide. Your initial section should contain only the top part of your hair, as Hair from the sides will mess up the braid’s look. Then, divide each section into three sections with equal lengths.
French braids are easy to make and look chic. They also serve as a protective hairstyle. You may feel like you’re doing a workout session when first learning, but it will get easier as you practice. Keep in mind that the French braiding technique requires a little practice.
Another trend that is sure to get you noticed is the claw clip ponytail. This Hairstyle allows you to experiment with color while keeping your hair in place, so don’t be afraid to try it out. It’s a great style to wear when the weather is warm and humid, and it will give you an effortless romantic vibe.
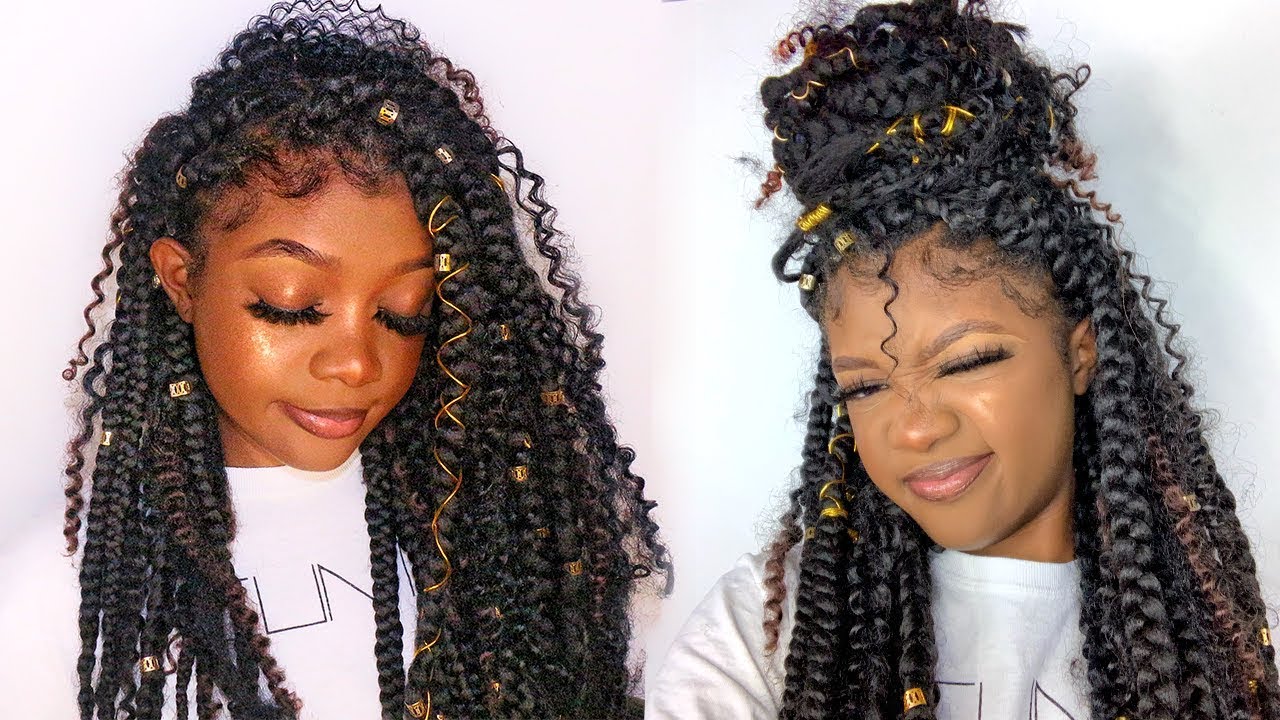
Unlike the classic chignon, curly Hair looks more natural when styled in a braid. You can also play with your hair by using more or less braids. Less braids will give you bigger waves, while more braids will create closer curls. The braided style can be worn day and night, and you can even put it up at night to have your hair ready for the next day!
To make a French braid, start by taking hair from the outside section. Make sure to focus on taking smaller sections as you work down the braid. This will help you create a tighter braid with less hair. Keep repeating this pattern until you run out of hair to incorporate. This will give you a tighter braid than if you were to stop braiding at the top.
Curly hair may be difficult to braid, and it may take more time than straight hair. A few tips will make the process easier and less time consuming. First, always remember that curly hair tends to be “bumpier” and harder to style. Use a styling cream or gel to help hold your curls in place. You can also use a detangling spray to keep your curls in place while braiding your hair.
Fishtail braids
If your hair is wavy or curly, you can use this technique for a sleek look. It’s low-maintenance and very versatile. It can be worn up or down and takes less than five minutes to complete. Using a clear elastic is recommended to secure the fishtail braid. You can leave the remaining pieces loose to give your hair a boho vibe.
You can also try butterfly braids, which are a variation of the fishtail braid. Butterfly braids start as a simple two-braid style and finish with a thicker jumbo braid. These braids look great no matter what length your hair is, and are easy to protect. To learn how to create fishtail braids, check out this tutorial from GlamFam.
To make your braids easier to manage, try using a hair setting lotion, such as liquid gel. When braiding, make sure to leave a little bend in the ends of your hair. This will help you control the braiding process and make it look neater. Once you’ve braided your hair, you can release the sections to create a loose, wavy look.
A fishtail braid is a funky alternative to a French braid. It has a unique look, and can be learned easily by a hair stylist or yourself. It’s also an excellent option for getting curls off the neck. A fishtail braid is a versatile option that will suit any occasion.
This braid is ideal for long hair, and it’s a great hairstyle for special occasions. If you don’t want to spend hours tying your hair, you can try side cornrows, which will give your curls some structure. You can also opt for low-maintenance mini braids to keep your curls from your face.
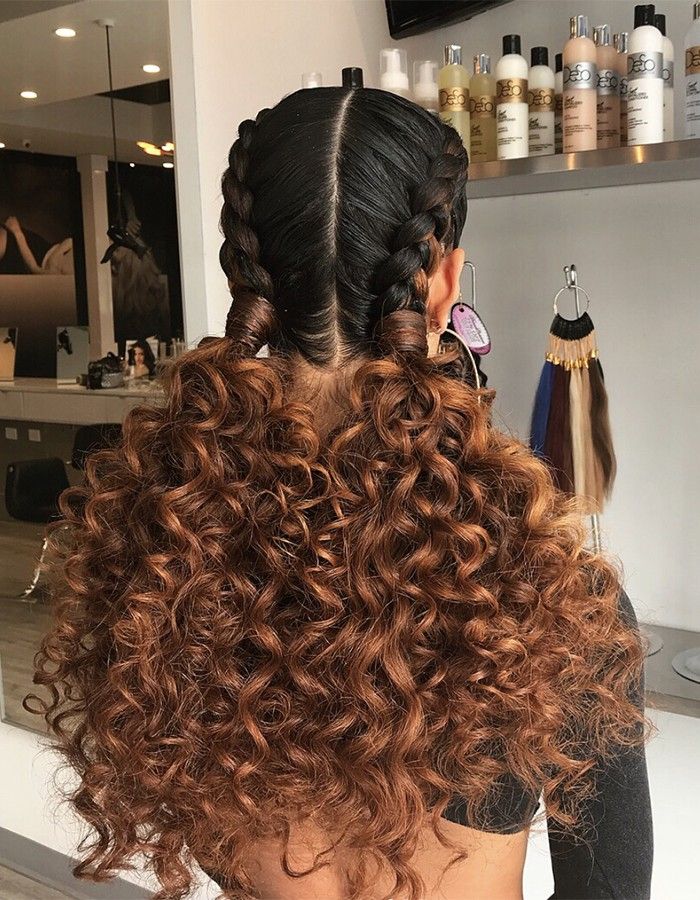
Dutch-braided buns
To create a Dutch-braided bun with curly hair, start from the front of the hair and work your way back towards the nape of the neck. After the braid is finished, wrap a small section of hair around an elastic band and secure it with hair pins. Clip up the deep side of the hair. Part the other side of the hair into two sections. Start the parting from the front.
If you’re worried about losing hold of your braid during the night, try wearing a protective sleep cap over your bun. It will protect the Dutch braid and prevent it from flattening and twisting while you sleep. This will also ensure that your hairstyle will stay intact and frizz-free for a longer time.
Part your hair in five sections and start Dutch braiding at the front and back. Start with the front section, and add more hair with each stitch. The braid should be snug against the scalp. Use a sectioning clip to avoid mixing the sections. Once you’re finished with the braid, secure it with a hair elastic and add a few loose strands to frame your face. Apply hairspray to help set your updo.
The Dutch braid starts at the front, close to the hairline. It continues below the ear on the opposite side. The braided hair is then wrapped around the elastic band, forming a bun. This bun looks romantic and is perfect for a romantic night out.
For a more formal occasion, you can add a Dutch braid crown or a reverse braid to your ballerina bun. This updo is also a great choice for highlight-treated hair, as it can add to the look of the golden locks. The braided bun will keep your hair from becoming frizzy and tangled.
Dutch braiding is relatively easy and doesn’t take much time. To start, simply brush your hair back to fall behind your shoulders and divide it into three equal sections. Brush the middle section first, then the sides, and then add a small portion of hair from the side on the opposite side.
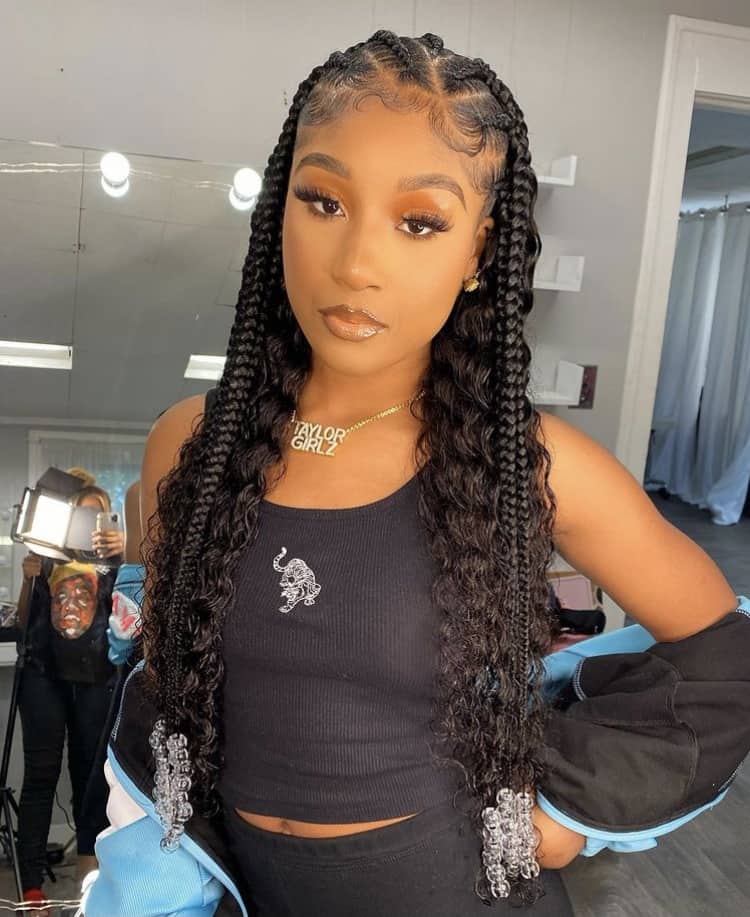
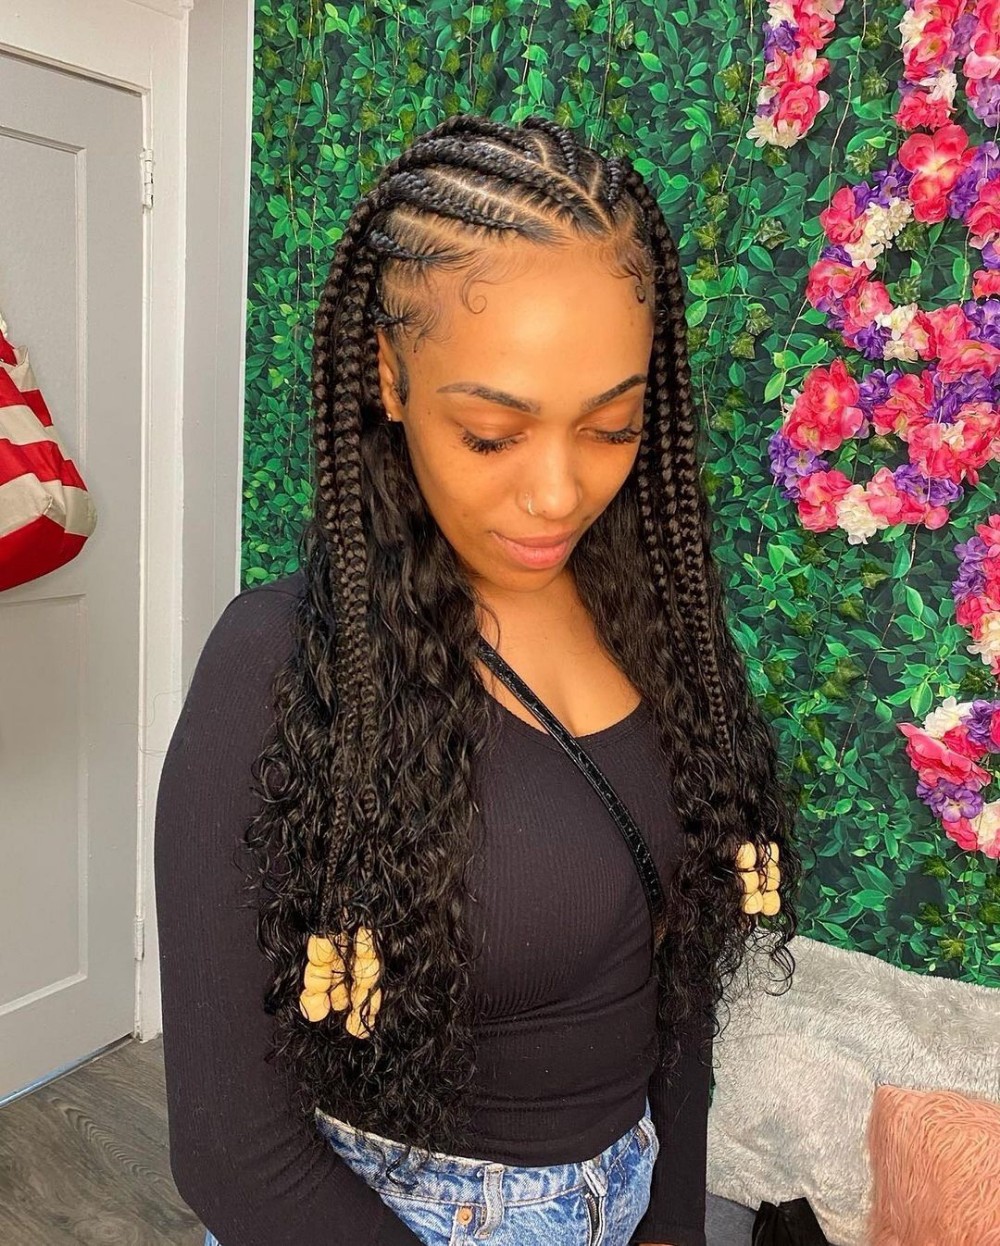
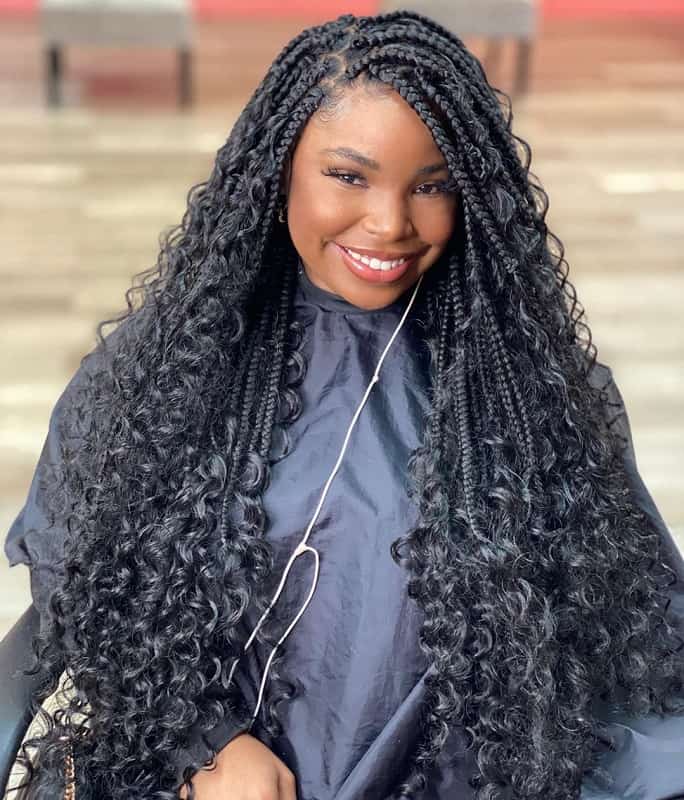
Square-parted braids
Square-parted braids are braids with sections of hair placed in squares. They are usually installed with hair extensions. They come in different sizes and colors. They are a popular style for women who want to add length to their tresses. Here are a few tips to create this stylish hairstyle.
The first step is to make sure your hair is clean. You can use any shampoo and conditioner, but a good brand for curly hair is SheaMotion. It will help to prevent any possible frizz. You should also use a rat tail comb to create your desired part design. After you have parting your hair, you can apply gel or edge control for a smooth finish. You can also use a rubber band to secure the ends of the braid.
Another option is to make the parts of your hair smaller. This can help to make the style more versatile. A box braid with a triangle part is flattering to most head shapes. It does require some tugging on the scalp, but it looks good on most people. You can also try a criss-cross parting, which pairs well with plaits that are textured. For best results, use a light color for the string.
Braids can also be worn as protective styles. They are low-maintenance but must be cared for properly. Moreover, it is important to moisturize the hair before braiding it. This will prevent the protective style from damaging the natural hair. Also, try to avoid tight braids, as these may create tension on the scalp and edges, which can lead to hair loss.
Ensure the braided hair is properly protected with a deep conditioning treatment and a moisturizing shampoo. For added strength and moisture, you can also use PATTERN’s Jojoba Oil Blend and a Hydrating Mist. You can also use a scalp serum that is specially designed for protective styles. The deep conditioner helps calm the roots and restore hydration.
For a more glamorous look, try tying gold or copper threads through the braids. This will add a royal touch to your hairstyle.