Dying your hair white can make a bold statement. Be prepared for its upkeep, as this process requires regular bleaching and toning treatments. Your hair will likely be very fragile and susceptible to heat styling tools; therefore, you should use only sulfate-free shampoo and conditioner products.
Preparation
Temporary hair dye is an easy and quick solution for mimicking white hair from characters from movies, games, or anime; or wanting to appear more aged for whatever reason. Just make sure that when doing this activity, you wear old clothing, as the process can become messy, and some types of dye may stain fabrics.
One way to lighten your hair quickly and affordably is with powder such as baby powder or cornstarch, though this method doesn’t always produce the desired results and could leave powdery spots more salt than pepper in your locks. Whichever way you select, conduct a strand test first and adhere to recommended processing times; otherwise, your coils could become irreparably damaged, which would be no fun!
Bleach
Before beginning with bleach, acquire all necessary supplies – tint brush, plastic mixing bowl and spoon, gloves, hair clips (preferably non-metallic ones), and clear plastic shower cap; for longer hair sections, divide into four parts using clips which do not react with bleach mixture and secure each piece using non-reactive clips. Start dipping your tint brush in bleach mixture and then apply it evenly throughout all your locks, but leave roots alone for now.
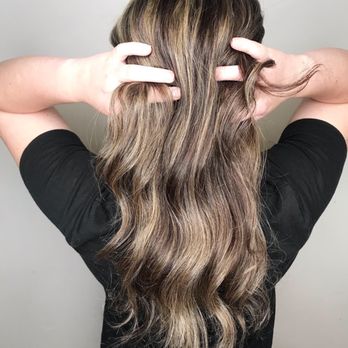
If you are starting from a dark shade of brown, several bleaching stages may be required before reaching platinum blonde. Therefore, you must communicate your desired final color goals to your colorist as soon as possible so they can advise on how many stages will be needed to reach that final goal.
Toner
After bleaching your hair, gently rinse it with cool water using a clean towel to squeeze out any excess liquid. Next step? Apply a toner.
Toners can help neutralize any remaining yellow pigments and lighten hair to its desired shade of white, depending on whether or not they come premixed with the developer. If opting for premixed toner, follow product directions on how to mix.
If you choose a ready-to-use toner, apply it using a tint brush and conduct a strand test to ascertain processing times; depending on how light you wish your toner to be involved, additional or reduced time may be required than manufacturers recommend. Afterward, wash and condition your hair again once toning is completed.
Developer
Hair dye developer contains various concentrations of peroxide to lift the cuticle and allow color molecules to penetrate and deposit onto hair follicles, with different volumes available for multiple purposes – low-volume developers like 10-20 are ideal for minor color changes or toning grey hair, while higher volumes such as 30-40 (containing 9 peroxide concentration) serve solely for lightening purposes, used together with lightening cream or powder to achieve results that go up to eight shades lighter.
Mix the dye and developer according to the ratio specified on your box, mixing in plastic containers for spill- and smear-proof mixing, then waiting only 60 minutes after mixing before beginning to dye your hair.
Conditioner
Conditioner is ideal for colored hair as it nourishes locks while helping lock in color by closing cuticles and protecting color pigment. However, mixing hair dye with conditioner may dilute its potency; although this might not be a consideration if using semi-permanent dyes, it should be taken seriously with permanent stains.
Assess your level of damage and establish the frequency with which you intend to dye your hair. Use a color-depositing conditioner to extend the time between colorings while still reducing damage. Furthermore, consider using vinegar rinses after dying your hair to help remove the residual pigmentation and avoid blotchy roots. Be wary when going outside into direct sunlight or using products that come into contact with it, as this may hasten its fading.