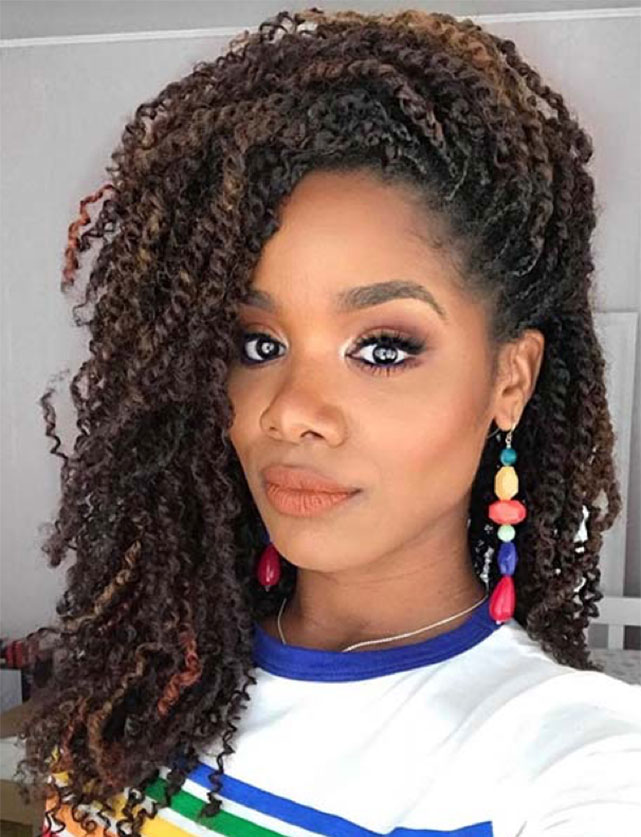
hair twists are an exquisite blend of culture and fashion that look edgy. Ideal for 4c hair types, but can be worn by anyone with the appropriate accessories.
1. Start with Two Sections
One key consideration when creating these textured braids is starting with two equal sections. Otherwise, creating an even twist becomes challenging and your finished result may appear uneven.
Once your hair is parted, it’s time to begin twisting! Taylor suggests applying curl cream or mousse prior to beginning twisting so as to give your style shape and definition. Experiment with using shea butter, twisting gel, or any other product suitable for your hair type to add twists to your twists. Just be sure to apply enough product so your twists do not leave crunchy or dry patches once in place; especially if you plan to keep them for several days before unraveling them.
2. Twist Each Section Over the Other
Although not an exact science, dividing your hair into sections for twisting can help speed up the process and avoid “stealing” pieces from one section to reach an end of a twist on the other side. This method will save time as you won’t need to “steal” pieces from different places just so they reach their ends of twists faster.
Once your hair has been divided into two even sections, it’s time to get twisting! Cross each strand over another until close to the ends – don’t rush this step; long-term definition for your twist style awaits! For an advanced style, try flat twisting your hair instead of forming the traditional two-strand twists to achieve an easier and more casual style with plenty of definition. We suggest using Organic Root Stimulator Lock